
Engage Arrive can signpost patients to fill in a questionnaire after they check in, either via the screen or their mobile device.
Questionnaires are managed from the Engage Arrive Management Console.
1. In your management console, go to "Patient Arrivals"
2. From there click "Questionnaires" to view the questionnaires menu.

Selecting a Questionnaire
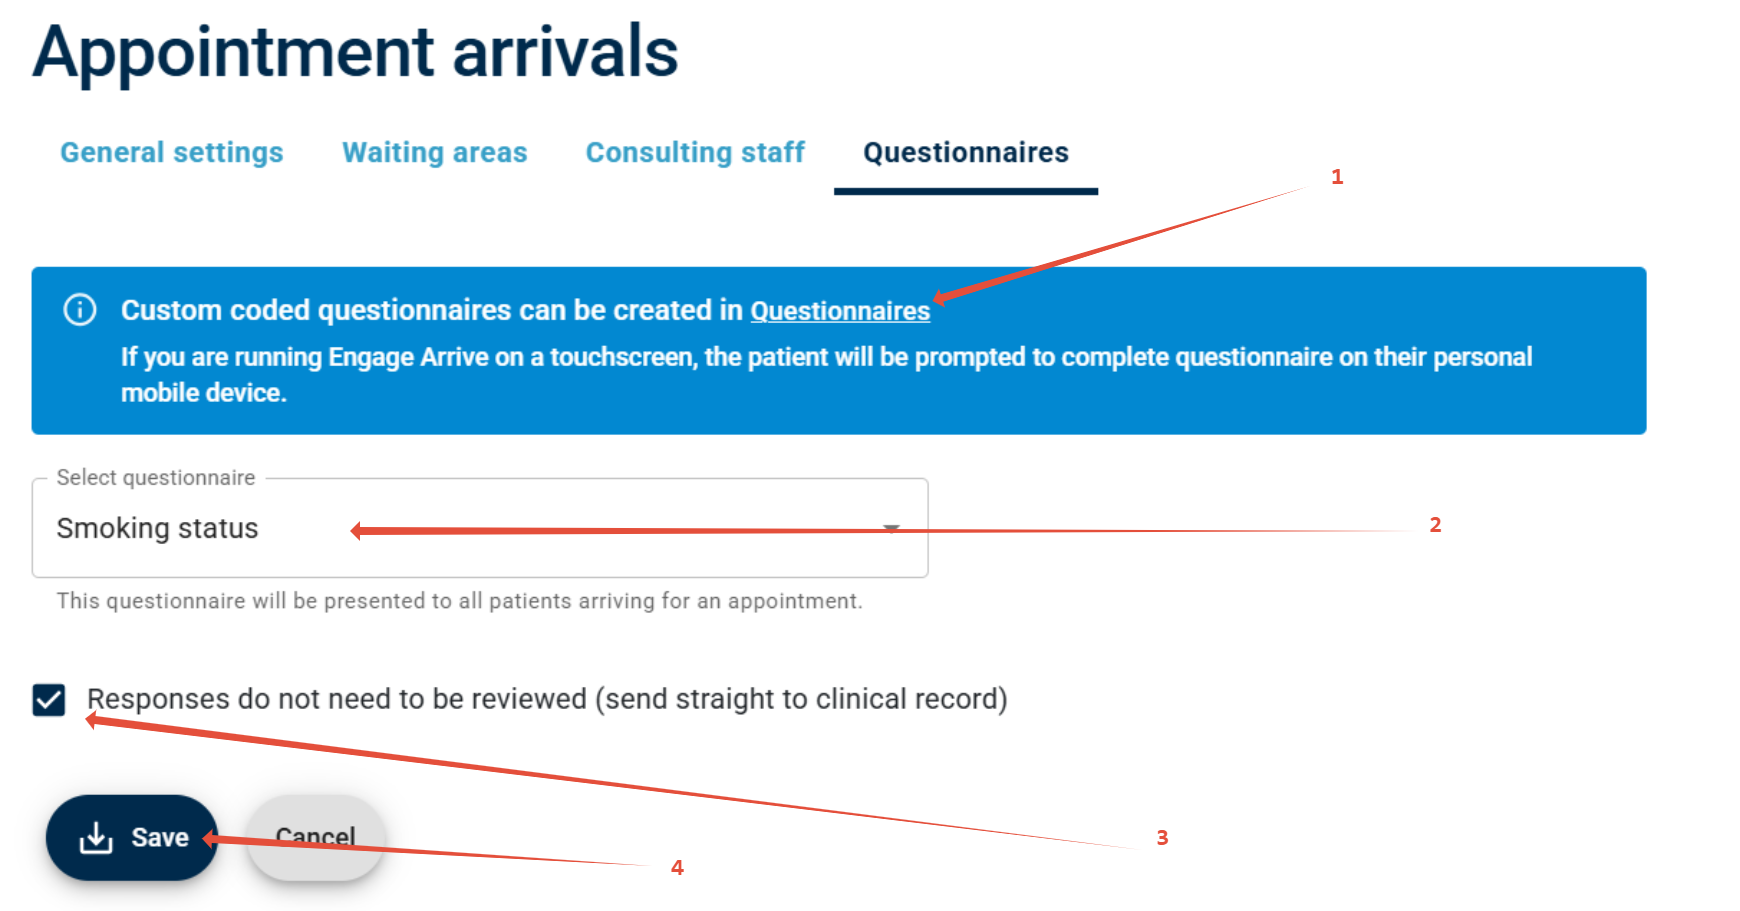
1. From the Questionnaire's menu, you can select one of the pre-made questionnaires form the drop down menu, the screen can only display a QR code for 1 questionnaire at the time, and this will show for all patients.
2. The drop down will also show any custom questionnaires you create via the build-your-own questionnaires page, accessible from the side menu, or from the link in the blue banner
3. Ticking this box will send the responses directly to the patient's clinical record. To use this feature you will need to select a default clinical user, details of how to do that are the bottom of this guide.
4. Once you've selected your Questionnaire, click Save.
Setting a default clinical user
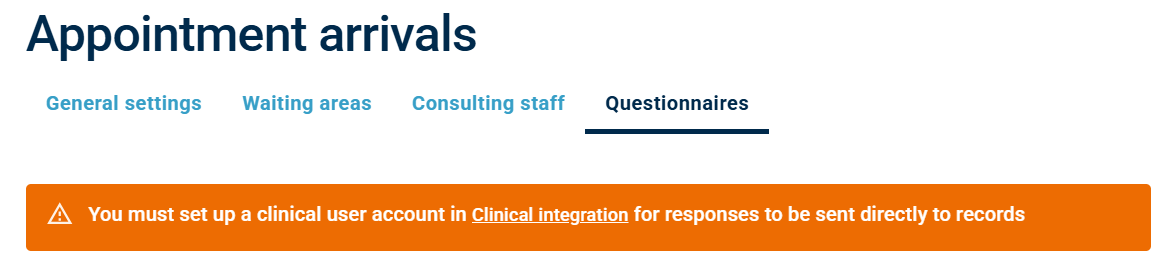
If you see this orange banner, it means you haven't set a default attach user, this is the user who's EMIS/SystmOne/Vision account is used to attach questionnaire responses directly to a patients clinical record, to set that click on the underlined "Clinical Information"
The link will take you to the following page
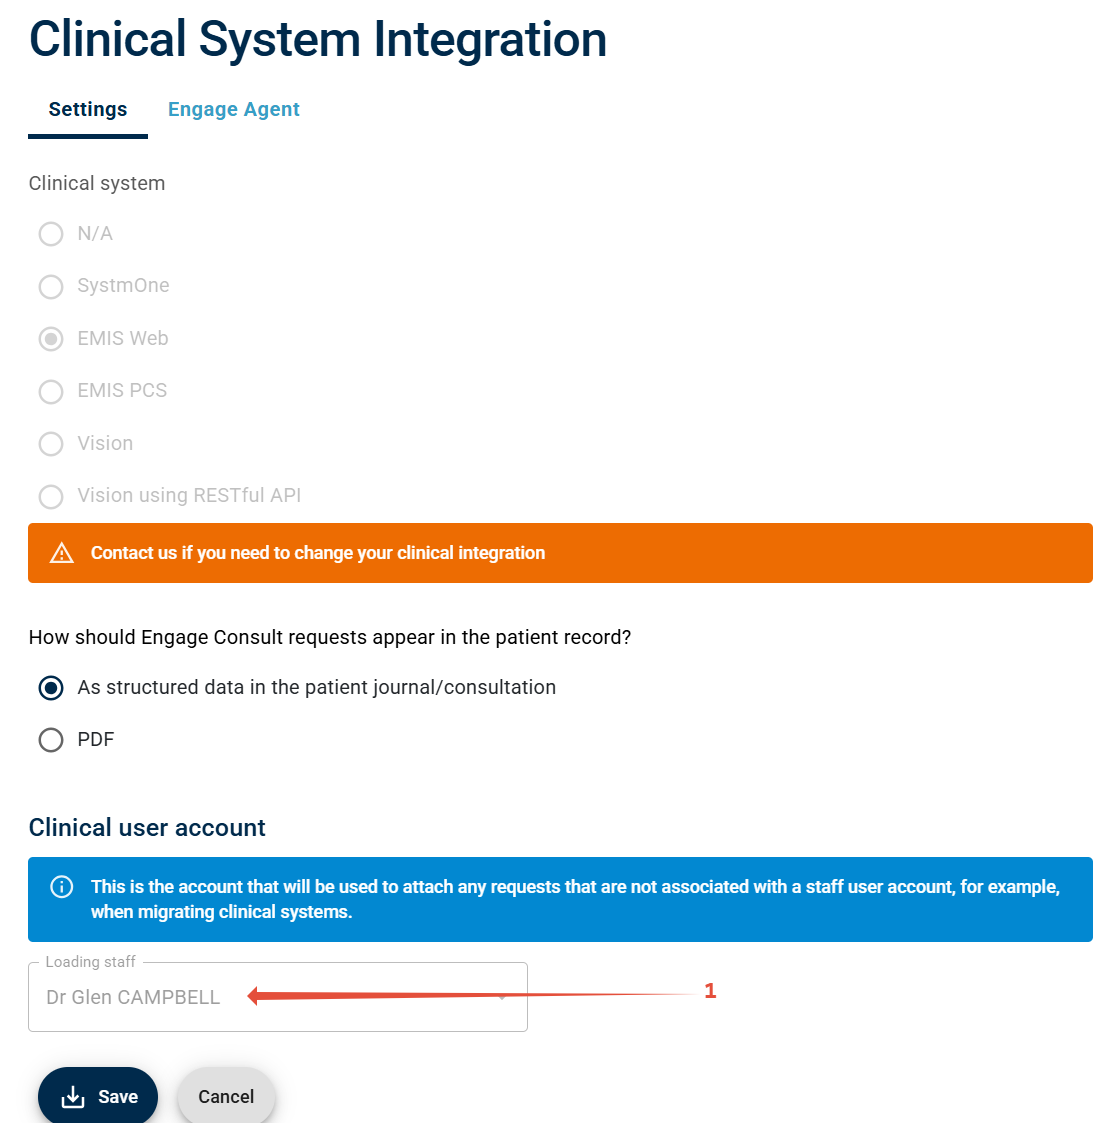
From the drop down menu (1) select a clinical user, this user account will then be used to attach completed questionnaires to the patient record, if that option is selected in the Questionnaires section.